Contact us

What Is 3D Prototyping and How Does It Work?

3d prototyping turns a digital concept into a physical object that people can inspect, touch, and improve. Designers begin with a computer-aided design model. Specialized software then slices the model into thin layers. A printer builds those layers using plastic, resin, metal, or other suitable materials. The result may resemble a finished product, but it remains a test version.

Dr. Adrian Bowyer, founder of the RepRap project, described the technology simply: “3D printing is a technology that allows you to make almost anything.” That idea captures its power, but it needs practical limits. Material strength, surface quality, printing speed, and machine accuracy can change the outcome. A small hole may close during printing. A thin wall may break during handling. These details matter in engineering work.

In real 3d prototyping projects, teams usually print an early model, examine it, and revise the design. They may test button placement, grip comfort, airflow, assembly, or movement. A prototype can reveal problems that remain hidden on a screen. It can also create false confidence if the chosen material differs from the final product.

This process is not magic.

It is controlled learning.

The following guide explains what 3d prototyping means, how the workflow operates, which technologies are commonly used, and where mistakes often appear. It also considers cost, production volume, material selection, and quality testing. Some designs need several attempts. That is not failure. It is useful evidence for the next decision.
What Is 3D Prototyping and How Does It Work?

What Is 3D Prototyping?

3D prototyping is the process of turning a digital design into a physical test part. It usually uses additive manufacturing, which builds objects layer by layer from polymers, resins, metals, or composite materials. Unlike traditional machining, it removes less material and supports quick design changes. The Wohlers Report 2024 valued the global additive manufacturing industry at approximately 20.0 billion US dollars in 2023, after 13.5% growth. This expansion reflects wider use in product development, engineering, healthcare, and education.

The workflow begins with a 3D CAD model. Slicing software then divides the model into thin layers and creates machine instructions. During printing, each layer bonds to the previous one. A technician may remove supports, cure the surface, sand rough edges, and inspect key dimensions. A small fitting error can appear around a screw hole or curved corner. That detail matters. Prototyping is not simply “printing a shape”; it is testing form, fit, function, and user handling. ASTM International identifies additive manufacturing as a process that creates parts from 3D model data, usually layer upon layer. Still, a prototype can warp, weaken, or behave differently from a final production part.

Tips: Keep the first model simple. Test critical dimensions with calipers. Leave clearance for moving parts. Record material, layer height, temperature, and post-processing steps. Do not treat one successful print as proof of long-term performance. Real testing may expose assumptions you missed.
Which Technologies and Materials Are Used?

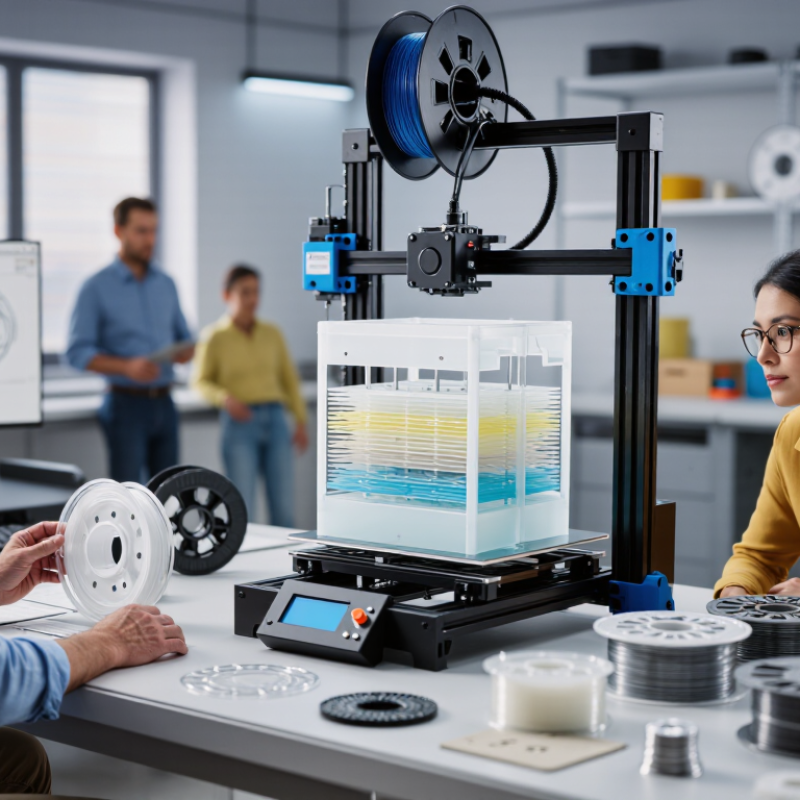
3D prototyping converts a digital CAD model into a physical part, usually through additive manufacturing.

The machine builds thin layers, often between 0.05 and 0.3 millimeters thick. Fused filament fabrication melts thermoplastic wire through a heated nozzle. It suits quick fit checks and low-cost functional models. Stereolithography and digital light processing cure liquid photopolymer with light, producing smoother surfaces and fine details. Selective laser sintering fuses nylon powder without support structures. Metal powder bed fusion uses a laser or electron beam to form dense metal components. The choice changes accuracy, strength, surface finish, and production time.

Materials matter more than many first-time users expect.

Common thermoplastics include PLA, ABS, PETG, and nylon, while engineering prototypes may use carbon-fiber-filled polymers. Photopolymers support visual models but can become brittle under heat or repeated loading. Aluminum, stainless steel, titanium, and tool steel powders serve demanding applications.

According to the Wohlers Report 2024, the global additive manufacturing industry reached approximately 20.0 billion dollars in 2023, growing 13.5 percent year over year.

That growth reflects broader material and process adoption, not just cheaper printers. In workshop testing, a nylon hinge may survive hundreds of cycles, yet its layer direction can still cause early failure. This is easy to miss. Designers should test orientation, moisture exposure, and post-processing before trusting a prototype.

Miniature failures are valuable evidence.

How Does the 3D Prototyping Process Work?

3D prototyping turns a digital design into a physical object for testing. The process usually begins with a clear product requirement. Designers define dimensions, movement, load, surface needs, and the user’s environment. A three-dimensional CAD model follows. Small details matter here. A hole may need extra clearance, while a thin wall may require reinforcement.

The digital file is then checked for gaps, sharp edges, and unsupported areas. Slicing software divides the model into thin layers and creates toolpaths for the machine. Settings such as layer height, printing speed, temperature, and support structures affect the result. Experienced technicians adjust these settings according to the material and part geometry. The first print is rarely perfect. It may show warping, weak joints, rough surfaces, or unexpected assembly problems.

After printing, the prototype receives post-processing. This can include removing supports, sanding surfaces, curing, trimming, or inserting hardware. Engineers then inspect key measurements with calipers and compare the part with the original requirements. Functional tests may examine fit, movement, strength, and heat resistance. A hinge might bind even when its dimensions look correct. That is useful evidence. The design is revised, printed again, and tested under more realistic conditions. Some assumptions still fail. 3D prototyping is therefore not only a production step, but also a practical method for discovering errors before larger-scale manufacturing.

What Is 3D Prototyping and How Does It Work?

3D prototyping converts a digital CAD model into a physical part through additive manufacturing. The chart shows representative layer-height ranges commonly used in prototype production. Smaller layers generally improve surface detail, while larger layers can shorten print time.

Values are representative process ranges in millimeters. Actual settings depend on the printer, material, geometry, and required finish.

What Are the Main Benefits and Applications?

3D prototyping converts a digital design into a physical model. Designers create a CAD file, then prepare it for layer-by-layer production. The machine follows digital instructions and builds the object from selected materials. This process can reveal problems that screens often hide. A handle may feel too thick. A joint may not move smoothly. These details matter in real use.

The main benefit is faster, clearer testing. Teams can examine size, comfort, strength, and appearance before full production. This reduces expensive tooling changes and supports better communication between engineers, clients, and users. 3D prototypes serve many fields, including product design, medical equipment, architecture, education, and custom manufacturing. They can represent a simple enclosure or a detailed moving assembly. However, a prototype is not always a perfect prediction of the final product. Material behavior, surface finish, and production tolerances may differ. That limitation deserves careful review.

Tips: Test the prototype with the people who will use it. Check fit, grip, movement, and maintenance needs. Record each weakness beside a proposed change. Do not trust appearance alone. A beautiful model can still fail during daily handling. Keep the design history, measurements, and test results together. This evidence improves decisions and makes later revisions more reliable.

What Is 3D Prototyping and How Does It Work? - What Are the Main Benefits and Applications?

Overview of common 3D prototyping methods, workflows, benefits, and practical applications.
Prototyping Method How It Works Common Materials Typical Strengths Typical Limitations Representative Applications
Fused Deposition Modeling (FDM) A heated nozzle deposits thermoplastic filament layer by layer according to a digital 3D model. PLA, ABS, PETG, nylon, and other thermoplastics Low equipment cost, simple operation, fast design iterations, and useful functional parts Visible layer lines, anisotropic strength, and lower surface detail than resin-based methods Concept models, brackets, enclosures, fixtures, educational models, and fit checks
Stereolithography (SLA) A laser selectively cures liquid photopolymer resin, solidifying the part one layer at a time. Photopolymer resins High dimensional detail, smooth surfaces, and accurate small features Parts may be brittle, require washing and post-curing, and can degrade with prolonged UV exposure Appearance models, small mechanisms, dental models, casting patterns, and detailed prototypes
Digital Light Processing (DLP) A projected image cures an entire resin layer simultaneously, rather than tracing each point with a laser. Photopolymer resins Fine detail, consistent layer exposure, and efficient production of multiple small parts Resin handling is required, and mechanical properties depend strongly on the selected resin and post-processing Jewelry patterns, dental components, miniature parts, and high-detail visual prototypes
Selective Laser Sintering (SLS) A laser selectively fuses powdered material into solid layers; surrounding powder supports complex geometries. Nylon, polyamide, and selected composite powders No dedicated support structures, strong functional parts, and freedom to create interlocking or internal features Powdery surface texture, higher equipment cost, and the need for powder handling and cleaning Housings, ducts, hinges, snap-fit components, low-volume end-use parts, and functional assemblies
Selective Laser Melting (SLM) A high-power laser fully melts successive layers of metal powder to form a dense metal component. Stainless steel, aluminum, titanium, and nickel-based alloys Complex metal geometries, high material performance, and part consolidation High cost, slower production, support removal, heat treatment, and machining may be necessary Aerospace components, medical devices, tooling inserts, heat exchangers, and lightweight structures
Material Jetting Print heads deposit tiny droplets of photopolymer or wax-like material, which are cured or solidified layer by layer. Photopolymers and support materials Very smooth surfaces, fine details, color capability, and multi-material prototypes Materials can be relatively expensive and may have limited long-term durability Product appearance models, ergonomic studies, medical visualization, and multi-material demonstrations
Core Workflow
Create a CAD model, export a printable file, prepare the build, manufacture the layers, remove supports if needed, and complete post-processing.
Main Benefit
Additive manufacturing enables rapid design changes with less material waste than many subtractive manufacturing processes.
Key Consideration
The best method depends on required strength, surface finish, accuracy, material behavior, part size, quantity, and budget.

What Limitations Should Designers Consider?

3D prototyping turns a digital design into a physical object. A designer builds a CAD model, prepares it for production, and creates the form layer by layer. The result may reveal problems that a screen cannot show, such as awkward grips, tight gaps, or unstable proportions. Yet a prototype is not always a reliable preview of the final product.

Material behavior is a major limitation. A printed part may feel rigid but fail under heat, pressure, or repeated movement. Layer direction can also weaken certain areas. Surface texture may hide small defects, while tight tolerances can change during printing, cooling, or finishing. A prototype can look convincing and still mislead us. I have seen teams approve a shape because it looked accurate, then discover that assembly required excessive force. That mistake is easy to repeat.

Tips: Test the prototype for its real purpose. Check fit, movement, strength, and user comfort separately. Measure critical dimensions instead of trusting appearance. Use the intended production material when performance matters. Keep records of print settings, finishing steps, and revisions. Small notes help explain unexpected results. Also, allow time for more than one iteration. Early models often expose only obvious issues, while deeper problems appear after handling. Designers should question what the prototype cannot represent, including long-term wear, manufacturing variation, and full-scale performance. Perfect results are rare. Careful doubt is useful.